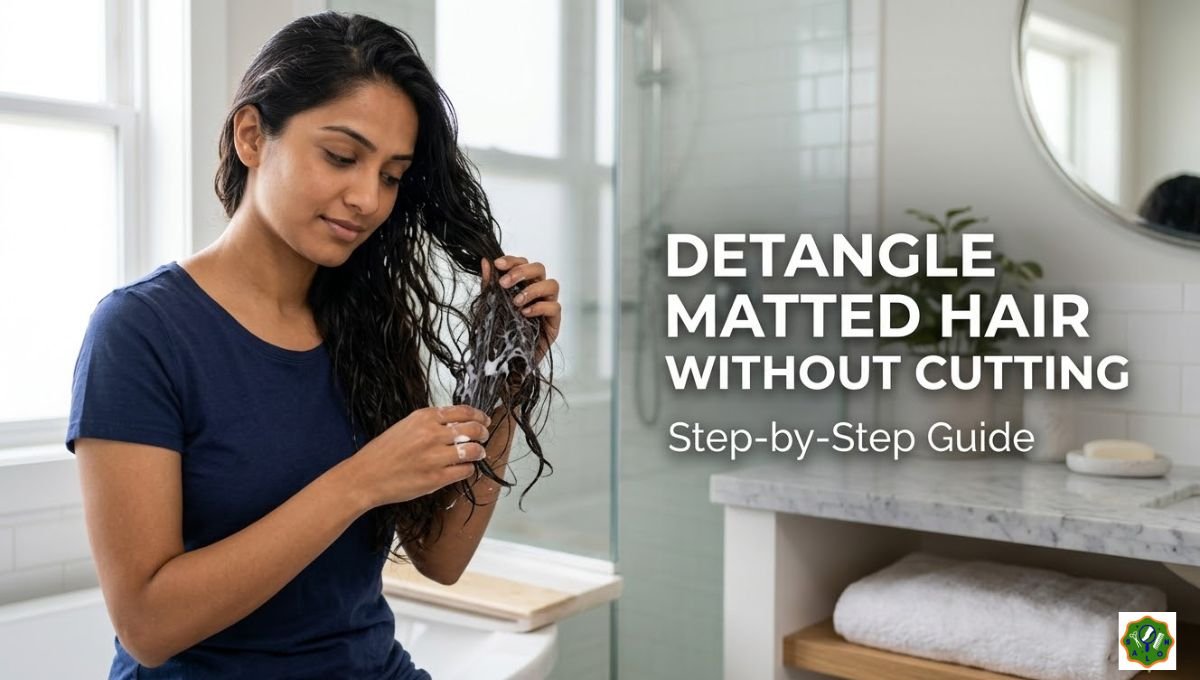
You reach up to run your fingers through your hair and immediately feel that dreaded resistance — a dense, tangled clump that refuses to budge. Your first panicked thought is scissors. But before you go anywhere near a pair of shears, take a breath. No matter how bad the matting looks, cutting should always be your last resort, not your first move. With the right technique, the right products, and a whole lot of patience, you can detangle matted hair without cutting a single inch off your length.
Matted hair is not the same as an ordinary tangle. It is a dense, interlocked mass of shed hairs wrapping around attached strands, trapping dirt, oil, and product buildup until the whole section becomes one tight, stubborn clump. It can happen to anyone — straight hair, curly hair, coily hair, children’s hair, adult hair. But the good news is it can also be undone by almost anyone, right at home, using ingredients and tools you likely already have. This complete guide shows you exactly how to detangle matted hair without cutting, step by step, without pain and without unnecessary breakage.
How to Detangle Matted Hair Without Cutting: What You Need First
Before you touch a single knot, gather your supplies. Using the wrong tools will make the process harder, more painful, and more damaging. Having the right ones within reach before you start saves time and protects your hair throughout the entire process.
Tools You Will Need
Wide-tooth comb: This is your most important tool. Unlike fine-tooth combs that snag and rip, a wide-tooth comb glides through sections with far less pulling and breakage. This is non-negotiable — do not substitute it with a regular brush at the start of the process.
Detangling brush: Optional but helpful, particularly for curly and coily hair. Look for one with flexible, widely spaced bristles that bend rather than drag. A detangling brush can follow up after your fingers have loosened the main mat.
Sectioning clips: You will be working in small sections. Clips keep the rest of your hair out of the way so you can focus on one area at a time without creating new tangles elsewhere.
Spray bottle filled with water: Your hair needs to stay moist throughout the entire detangling session. A spray bottle lets you re-wet specific sections quickly without soaking your whole head repeatedly.
Rat tail comb: The narrow, pointed end is useful for breaking apart individual knots at the core of a severe mat, loosening strand by strand without pulling the entire section.
Products You Will Need
Deep conditioner or leave-in conditioner: This is the most important product. Conditioner provides slip — the lubrication that allows strands to slide past each other rather than catching and tearing. Apply it generously.
Natural oils: Coconut oil, olive oil, and argan oil are the most effective choices. Oil softens the mat, adds additional slip, and helps strands glide apart without snapping.
Detangling spray: A lightweight detangling spray can be reapplied throughout the session to keep sections from drying out as you work.
Clarifying shampoo (optional): If your mat contains heavy product buildup — from dry shampoo, styling gel, or mousse — a gentle clarifying wash before detangling can break down that residue and make the mat significantly easier to work through.
Step-by-Step: How to Detangle Matted Hair Without Cutting
Work through these steps slowly and in order. Skipping steps — especially the early preparation stages — is the most common mistake people make, and it always makes the process longer and more painful.
Step 1: Assess the Mat Before Doing Anything
Look at the matted section carefully before touching it. Is it one dense clump or several smaller mats close together? Is there visible debris — lint, product buildup, or dirt — trapped inside? Is the mat near the scalp or further down the length? Understanding what you are dealing with helps you plan your approach. Mats very close to the scalp require extra caution because pulling on them tugs directly on the follicles, which is both painful and damaging. Mats further down the hair shaft are generally easier to work with.
If the mat is caused by head lice, a scalp infection, or is so severely compacted that the hair inside feels hard and fused rather than fibrous and soft, see a professional stylist. These specific conditions are not suited for home detangling.
Step 2: Soften the Mat With Oil or Conditioner — And Wait
This is the step most people rush through, and it is the most important one. You cannot safely detangle a dry, unsoftened mat. Trying to do so causes snapping, breakage, and pain.
Apply a generous amount of coconut oil, olive oil, or argan oil directly onto the matted section. Work it in with your fingers, pressing it into the mat from all sides so it penetrates the center — not just the surface. Then apply a thick, moisturizing conditioner on top of the oil. The oil and conditioner work together: the oil softens the strand structure, and the conditioner creates the slip that allows strands to separate.
Once applied, cover the matted section — or your entire head — with a plastic shower cap. Leave it on for at least 30 minutes. For severe mats, leave it on for one to two hours. For extremely compacted mats, apply oil overnight, sleep with a shower cap on, and begin the detangling process the next morning. The longer the product sits, the softer and more workable the mat becomes.
Step 3: Section Your Hair Into Manageable Parts
If you have multiple mats or a full head of tangled hair, do not try to tackle everything at once. Divide your hair into two to six sections depending on thickness, securing all sections except the one you are working on with clips. This prevents other areas of your hair from tangling together while you work, and makes the task feel far less overwhelming.
For children, sectioning is especially important — it keeps the session shorter and less frustrating by making clear, visible progress one section at a time.
Step 4: Work With Your Fingers First — Always
Never start with a comb on a severe mat. Your fingers are the most sensitive and the most controlled tool available. They can feel tension and resistance in real time and adjust instantly, which no comb or brush can do. Combs and brushes cannot detect the point where gentle pressure becomes damaging force — your fingers can.
Using your index finger and thumb, gently pick at the very outer edges of the mat. Do not grab the center and pull. Work around the perimeter, easing individual strands free and smoothing them outward from the mat one at a time. Think of it like unraveling a ball of yarn — you find the loose outer threads and ease them away before working inward.
As the edges begin to loosen, work your way toward the center of the mat slowly. If you feel resistance, stop and apply more oil or conditioner spray rather than forcing through. Patience at this stage protects hundreds of strands that would otherwise snap.
Step 5: Introduce the Wide-Tooth Comb — Ends First, Always
Once your fingers have loosened the outer layers and the mat has started to open up, introduce your wide-tooth comb. The single most important rule of detangling is this: always start from the ends, never from the roots.
Starting at the tip of the hair, gently draw the comb through the last two to three inches. When you hit resistance, stop. Do not force through. Hold the section just above the tangle with your other hand to prevent the pulling sensation from reaching the scalp — this protects the follicle and significantly reduces pain.
Work the comb through that bottom section until it moves freely, then move two to three inches up toward the root. Repeat the same process. Continue moving upward in small increments, never jumping straight to the root until everything below it is already free.
If the starting from the root, you may actually tighten the knots on the way down, making for a tougher job and more breakage — this is the key reason why starting from the ends is non-negotiable.
Step 6: Reapply Product Throughout — Do Not Let Hair Dry Out
As you work through the mat, your hair will start to dry. Dry hair loses its slip, and tangled strands become harder to separate as moisture evaporates. Keep your spray bottle close and mist the section you are working on regularly. Reapply oil or detangling spray whenever you feel the comb starting to catch more than it should.
There is no such thing as using too much product at this stage. Saturating the hair generously is always better than fighting a dry, resistant mat that is becoming tighter as you work.
Step 7: Tackle the Core Knot With the Rat Tail Comb
At the center of most severe mats, there is often one or more tight, individual knots holding the entire clump together. Once the outer mat has been loosened by your fingers and wide-tooth comb, these core knots become visible and accessible.
Use the pointed end of a rat tail comb to gently insert into the center of the knot and work it apart. The goal is to loosen through the middle of the knot first, breaking it into two or three smaller loops, and then ease each of those apart strand by strand. This technique is slow but allows you to release even very tight knots without cutting them out.
For loops — where strands have genuinely looped through each other — a crochet hook or loop-turning tool can be used to pass the end of the hair back through the loop to release it without pulling or cutting. This technique requires patience but is remarkably effective on otherwise impossible knots.
Step 8: Wash, Deep Condition, and Finish With a Cold Rinse
Once all mats are fully detangled, it is time to wash your hair properly. Gently wash with a moisturizing or hydrating shampoo — not a clarifying shampoo, which can strip the moisture you have just restored. Apply a deeply nourishing conditioner and let it sit for at least five minutes. Then rinse with cold water. Cold water closes the hair cuticle, seals the strand, and reduces the chances of tangling during the drying process.
After rinsing, apply a lightweight leave-in conditioner or detangling spray while your hair is still damp. Air dry your hair for at least the next few days and avoid any heat styling while your strands recover from the stress of the detangling session.
Special Tips for Different Hair Types
Curly and Coily Hair
Curly and coily hair is the most prone to matting because of the bends and twists along each strand that naturally cause neighbouring hairs to catch on each other. Always detangle curly and coily hair when it is damp — never bone dry — and use a detangling brush with flexible bristles after your fingers have done the initial work. Detangle in sections while in the shower with conditioner still in your hair for maximum slip. Once done, do not disturb the curl pattern — apply a leave-in and let it air dry undisturbed.
Straight and Fine Hair
Fine or straight hair tends to mat less severely but becomes incredibly fragile when wet. Work on slightly damp hair rather than soaking wet hair, and always hold the section above the tangle firmly to prevent root pulling. A lightweight detangling spray is preferred over heavy oils, which can weigh fine strands down and make them harder to separate.
Children’s Hair
For children, the most important factor is speed — the shorter the session, the better. Saturate the hair generously and work in very small sections. Put on a favourite movie or show to keep the child calm and still. Use your fingers almost exclusively on children’s hair and follow up with a wide-tooth comb only when the section already feels mostly loose. Never force a comb through a child’s matted hair.
What Causes Matted Hair — And How to Make Sure It Never Happens Again
Understanding what caused the matting in the first place is the most powerful prevention tool you have.
Common Causes of Matted Hair
Matted hair happens when shed hair strands get tangled around hairs that are still attached to your scalp, which causes a knot. As the tangles worsen, they trap dirt and sweat which then turns them into tightly matted clumps. The main triggers include going too long without combing or brushing, sleeping with loose hair on a cotton pillowcase, washing without properly conditioning afterward, using heavy styling products without regular washing, sleeping with wet hair, and high-porosity hair that has a naturally raised cuticle that catches on neighboring strands.
Prevention Habits That Actually Work
Protect your hair while sleeping: Every time you sleep without protecting your strands, you run the risk of your strands twisting together overnight. Use a silk or satin bonnet, scarf, or pillowcase. Silk and satin create far less friction than cotton, which means your hair slides rather than catches as you move during sleep.
Detangle consistently and regularly: The single best prevention is not letting tangles sit and compound into mats. Detangle after every wash, and lightly comb or brush before bed. Little and often is far more effective than one big session after weeks of neglect.
Trim split ends every six to eight weeks: Split ends are rough and frayed at the tip, which means they catch on other strands much more easily than a clean, healthy end does. Regular trims remove this source of friction before it contributes to new tangles.
Keep hair moisturized: Dry, brittle hair has a raised, rough cuticle that snags easily. Well-moisturized hair has a smoother cuticle that slides past other strands rather than catching. Use a leave-in conditioner after every wash, apply a weekly deep conditioning treatment, and seal with a light oil to retain that moisture between wash days.
Wear protective styles: Braids, twists, buns, and similar styles keep strands contained and prevent them from tangling freely — especially during sleep or physical activity. Just make sure styles are not too tight, as tension at the root causes its own type of damage over time.
Wash and condition regularly: Dirt, sweat, and product buildup get trapped inside hair and make matting significantly more likely. A regular wash day routine with thorough conditioning keeps hair clean, smooth, and manageable.
When Should You Actually Cut?
Home detangling works for the vast majority of matted hair situations. But there are specific circumstances where cutting is genuinely the right call.
Consider cutting — or seeing a professional stylist — if the mat is so severely compacted that the hair inside feels solid rather than fibrous, if the mat is caused by head lice or a scalp infection, if the hair at the root of the mat is visibly damaged and would likely break anyway, or if you have spent multiple long sessions working on a single mat without meaningful progress.
Even in these cases, the goal should be to cut as little as possible. A skilled stylist can often cut just the core of a severe knot while saving the majority of the surrounding length — a far better outcome than removing the entire matted section.
A Quick Reference: Do’s and Don’ts of Detangling Matted Hair
Do This
- Saturate the mat thoroughly with oil and conditioner before starting
- Let the product sit for 30 minutes to two hours before working
- Start with your fingers before introducing any tool
- Work from the ends upward, never from the root down
- Hold the section just above the tangle to protect the scalp
- Keep the hair damp throughout with a spray bottle
- Section the rest of your hair away to prevent new tangles forming
- Follow up with a deep conditioning treatment after detangling
Never Do This
- Do not try to force a comb or brush through a dry, unsoftened mat
- Do not start combing from the root
- Do not rush — forcing through resistance breaks strands
- Do not use a fine-tooth comb at any stage of the detangling process
- Do not skip the post-detangle wash and deep conditioning step
- Do not use heat on freshly detangled hair for at least a few days
Final Thoughts
Matted hair can look and feel intimidating — but it is almost always salvageable. The key to success is not product strength or tool quality, though both matter. The real key is patience, preparation, and following the right order of steps. Soften first. Finger-work the edges. Comb from the ends. Keep hair moist. Work in small sections. And never force.
If you have been putting off dealing with matted hair because you assumed cutting was your only option, today is the day to try a different approach. Set aside a few hours, gather your tools, put on a good show in the background, and go slowly. Your hair is worth the effort — and it is very likely that every strand can be saved.
Note: This guide covers typical matting caused by lifestyle and hair care habits. For matting caused by medical conditions, scalp infections, or head lice, please consult a qualified hair care professional or dermatologist.